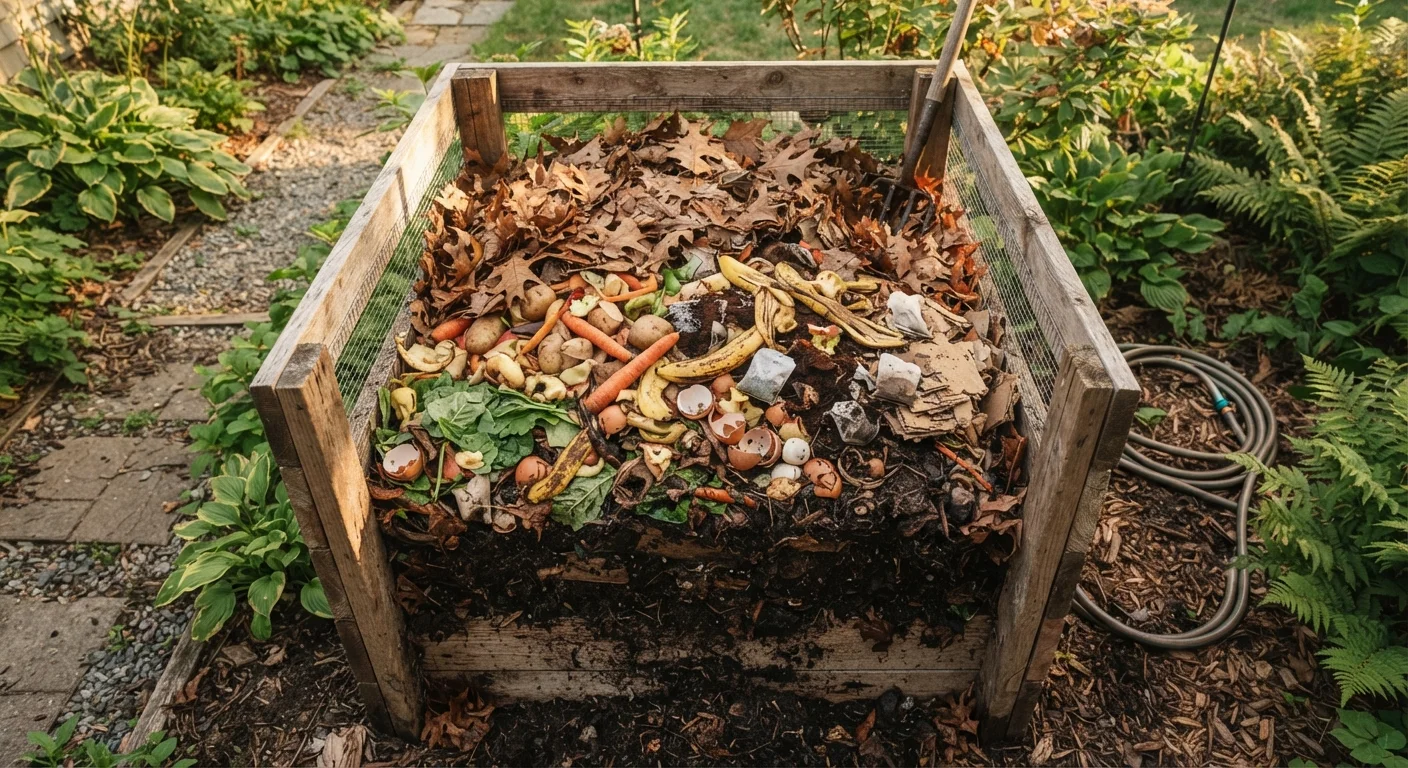
Why Composting Is Worth the Effort
Composting converts material most households throw away - vegetable peels, coffee grounds, grass clippings, fallen leaves - into a stable, nutrient-rich soil amendment that gardeners call humus. Applied to garden beds, it improves drainage in clay soils, helps sandy soils retain moisture, and feeds soil biology that makes nutrients available to plant roots.
The practical upside extends beyond the garden. The EPA estimates that food scraps and yard debris account for a significant share of what ends up in landfills, where organic material breaks down anaerobically and produces methane. Composting at home diverts that material and puts it to direct use on your property.
If you're planning a food garden, finished compost is one of the most effective soil improvements you can make before planting. See our guide to starting a vegetable garden from scratch for how to incorporate it into bed preparation. And once your beds are established, compost pairs well with a sound mulching strategy to lock in moisture and suppress weeds.
What you will need
What You'll Need
Composting doesn't require expensive equipment. The list below covers everything needed to build and manage a functional pile.
Compost bin or designated pile area
Contains the composting material, retains heat and moisture, and keeps the pile tidy.
Pitchfork or compost-turning tool
Used to turn and aerate the pile, which speeds decomposition.
Garden hose or watering can
Adds moisture when the pile becomes too dry.
Kitchen compost pail or countertop container
Collects food scraps indoors before transferring to the outdoor pile.
Compost thermometer
Measures internal pile temperature to confirm active decomposition (ideally 130-160°F).
Building and Managing Your Compost Pile
Follow these steps to set up a compost system that breaks down reliably without persistent odor or pest problems.
Choose and prepare your composting location
Select a level spot with partial shade and good drainage. Direct sun dries piles out quickly; full shade slows decomposition. Position the pile or bin at least 10 feet from the house and away from property lines where odors might be a concern. If using an open pile, outline a 3-foot by 3-foot minimum area - smaller piles struggle to generate enough heat to decompose efficiently.
Understand and gather your two input categories
Compost relies on a balance of two types of material:
- Browns (carbon-rich): dry leaves, straw, shredded newspaper, cardboard, wood chips, paper bags
- Greens (nitrogen-rich): fruit and vegetable scraps, coffee grounds and filters, fresh grass clippings, plant trimmings, eggshells
A rough target is roughly 3 parts browns to 1 part greens by volume. More browns than that slows things down; more greens and you risk odor and a slimy pile.
Build your initial pile in layers
Start with a 4-inch layer of coarse browns (wood chips or twigs) directly on the ground to allow airflow at the base. Add a 2- to 3-inch layer of greens, then cover with another layer of browns. Repeat until the pile is at least 3 feet tall. Water each layer lightly as you build - the pile should feel like a damp sponge, not saturated.
Continue adding material as it becomes available
After the initial build, add kitchen scraps and yard waste in the same brown-to-green ratio. Bury fresh green material in the center of the pile rather than leaving it on top - this reduces odor and discourages flies. Each time you add greens, cover with a layer of browns.
Turn the pile regularly
Turning introduces oxygen, which feeds the aerobic microorganisms doing the decomposition work. For fast compost (two to three months), turn the pile every one to two weeks. For a more hands-off approach, turning once a month still produces usable compost - it just takes longer, typically four to six months. Move material from the outer edges toward the center when you turn.
Monitor moisture consistently
Squeeze a handful of pile material. It should hold together and release only a drop or two of moisture - similar to a wrung-out sponge. If it's dusty and crumbles apart, water the pile slowly with a hose and turn to distribute moisture. If it's dripping wet, add dry browns and turn to introduce air.
Harvest and use finished compost
Finished compost is dark brown, crumbly, and smells like earth - not like the original ingredients. You won't recognize individual pieces of food or plant material. Use a garden fork to pull finished compost from the bottom of the pile, where decomposition completes first. Apply 1 to 3 inches to garden beds and work it lightly into the top few inches of soil. For container plants, blend it into potting mix rather than using it straight.
Speed Things Up with a Two-Bin System
Once you're generating compost regularly, consider a simple two-bin setup: one bin for actively building material and one for a curing pile. This lets you stop adding to one pile and allow it to finish while continuing to feed the other. The result is a more consistent supply of finished compost throughout the growing season.
Know Your Local Rules Before You Start
Some municipalities have guidelines or restrictions on open compost piles, particularly regarding distance from property lines or the use of enclosed bins. Check with your local extension office or municipal website before setting up. Using an enclosed, pest-resistant bin is often a straightforward way to meet most local requirements and is generally a good practice regardless.
Common Problems and How to Fix Them
Even well-intentioned compost piles run into trouble. Here's how to diagnose and correct the most common issues:
- Pile smells like ammonia
- Too many greens. Add more browns - dry leaves or shredded cardboard - and turn the pile to improve airflow.
- Pile smells like rotten eggs
- The pile is too wet and has gone anaerobic. Turn it immediately, mix in dry material, and check drainage at the base.
- Nothing is breaking down
- Usually caused by insufficient nitrogen (too many browns), dryness, or pile size too small to generate heat. Add green material, water lightly, and consolidate into a larger mass.
- Pests are getting in
- Avoid adding meat, dairy, cooked food, or oily scraps. If wildlife is persistent, use a bin with a locking lid or hardware cloth lining the base and sides.
For a broader look at gardening misconceptions - including some that affect soil health - common garden myths that quietly hurt plants is worth a read before you amend your beds.
Never Compost Diseased Plant Material
Plants visibly affected by fungal disease, blight, or pest infestation should not go into a home compost pile. Home piles rarely reach sustained temperatures high enough to kill pathogens or weed seeds reliably. Diseased material can reintroduce problems to your garden when you apply the finished compost. Bag it and dispose of it with yard waste pickup instead.